|
|
|||||
|
|
|||||
|
A Digital Aerial Photography Experience Text and photos by Jon
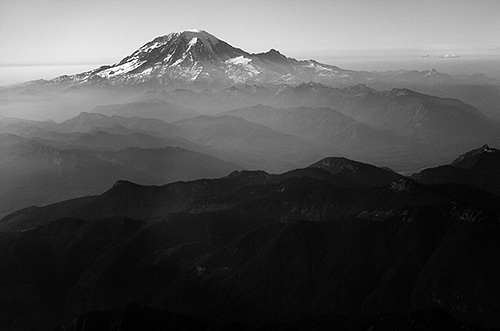
Hill, August 2004 Last month I was graciously invited to fly over Mount Saint Helens in Washington State. The invitation came from a friend of my sister. I'd like to start off by saying thanks to Eric for his generosity. I arrived at McAllister Field in Yakima, Washington just before 6pm. The sky was unusually hazy, even for July, due to fires in nearby forests. Eric greeted me and we decided to make the flight in spite of the smoke. Soon we were taxiing in the rented Cessna. (The Cessna was a great choice of planes for photography for two reasons, first, the wings are above the passengers and out of the photos, and second, the plane flies slow enough that the window can be opened at low elevation.) We quickly gained altitude and found ourselves mired in smelly smoke from the fires. It took 20 minutes to climb out of it and out of the distant haze Mount Rainier began to materialize off to our right. A while later Mount Adams coalesced to the left. Our path to Mount St. Helens lay directly between the two. The sun was dropping toward the horizon almost directly in front of us, so as we passed Mt. Rainier, it was nicely lit from the side. However, we were quite a distance from the mountain and with the haze, the colors in the scene were muted. In the end, I decided to make the nicest print as a black and white.
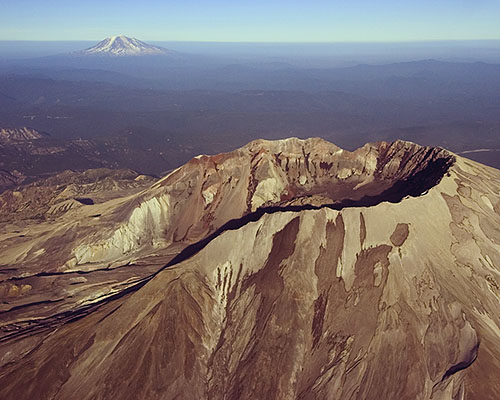
We passed Mt. Adams on the left, but I decided to wait to take photos until the return leg of the trip when the mountain would be on my side of the Cessna. Mount St. Helens, much diminished in size after it's explosive eruptions in the early 1980's, started to take form directly ahead. Eric made a circle around the mountain, keeping it on the right side of the airplane for me. I frequently made requests that he lift the wing to get it out of my compositions. The one I like the best shows the St. Helens crater and Mt. Adams in the distance.
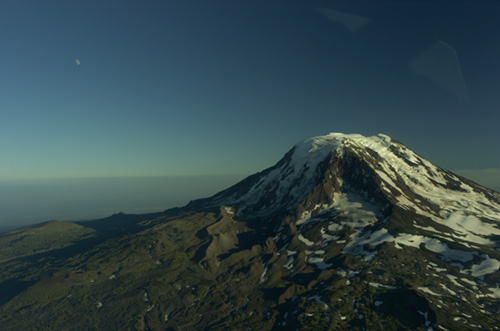
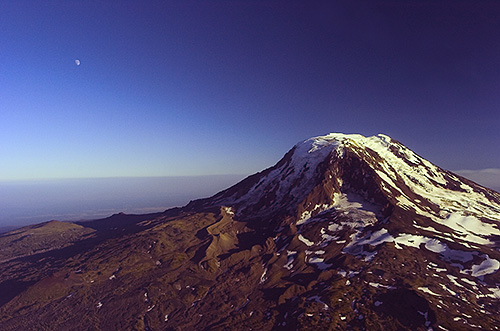
After circling St. Helens, we aimed towards Mt. Adams, hoping to get close enough to reduce the haze in our view of the mountain. I was using a polarizer with good results, but the contrast and color in the images was a bit lacking. The D2H calculates its white balance in part using a sensor on the top of the camera. I'm sure it was confused by the differences in the light inside and outside of the aircraft. But I was shooting in RAW mode (NEF) and knew that I could adjust the color and contrast very effectively in post-processing. The moon was up, and Eric made a few banking turns to get me clear views of Mount Adams with the moon in the frame. The best shot had terrible color and showed reflections in the window of the airplane. I used Adobe Camera Raw to correct the color and contrast. The window glare was removed using the clone tool. Final color tweaking was completed using the Color Variations tools in Adobe Photoshop. (See both before and after photos.)
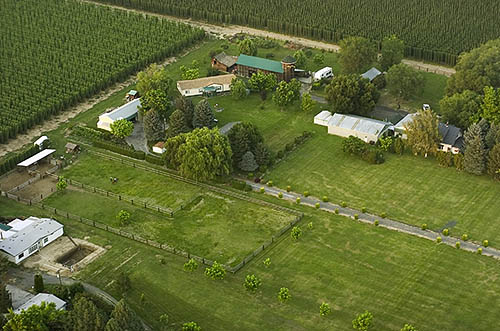
It was time to return to Yakima. As we descended through the smoke, the colors warmed up. Everthing on the ground took on a gold tone. We flew over Eric's family's farm and took a few photos out the open window to maximize clarity. A fair bit of Photoshop was still needed to bring the photo to a printable state, but it was worth the effort as Eric was pleased with the final result.
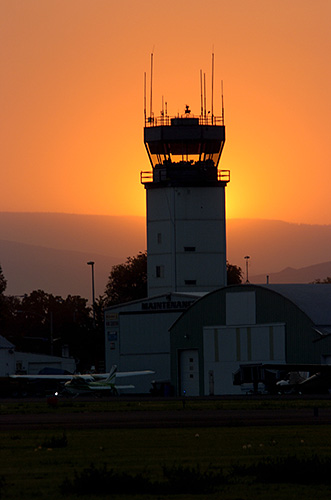
Upon landing, I happened to glance to the west and see the sun descending to the horizon, directly behind the air traffic control tower. The tower made a nice silhouette against the blazing orange of the smoke-filled sky.
Several tools make this kind of photography possible for those shooting digitally, even under less than ideal conditions. Here are a few of the aerial photography lessons I learned during and after my 2 hour flight with Eric: 1. Shoot in RAW mode. It gives a lot more control over exposure, contrast, and color than a JPEG image would. Of course this means you need software to deal with the RAW files. The camera makers each have their own software but I'm currently using Adobe Camera Raw, included in Adobe Photoshop CS, to manipulate RAW files. 2. Use a polarizer to cut the effect of haze in the sky. Keep adjusting it as the flight continues to deepen the blue in the sky. 3. It helps to have a pilot willing to bank the plane to allow better framing and composition. 4. If you can't get the color right, try desaturating the image to make a black and white photo. Then adjust the levels and contrast to maximize detail. 5. Keep your shutter speed high (above 1/500th sec) to avoid blur from the vibrations of the aircraft, or wind when hanging your camera out the window at 130mph. 6. Pilots like to receive nice prints after a flight! I hope I'll get the chance to fly with Eric again in the future.
|
|||||
|
|
|||||
|
All images in this site are copyrighted. Do not copy or use without permission. |
|||||